
Install the printer
- Install the maker's Windows driver. For a TSC TE244, the Seagull "TSC TTP-244" driver works.
- Load the roll and close the lid.
- Open Barcode Studio from the menu (under Billing POS). The same label settings are in the Printers window (the Printer: status at the bottom) and in Settings → Invoice & Bill Rules.
When it is the only label printer and none is chosen yet, KamaiPlus chooses it by itself and tells you.
Barcode Studio
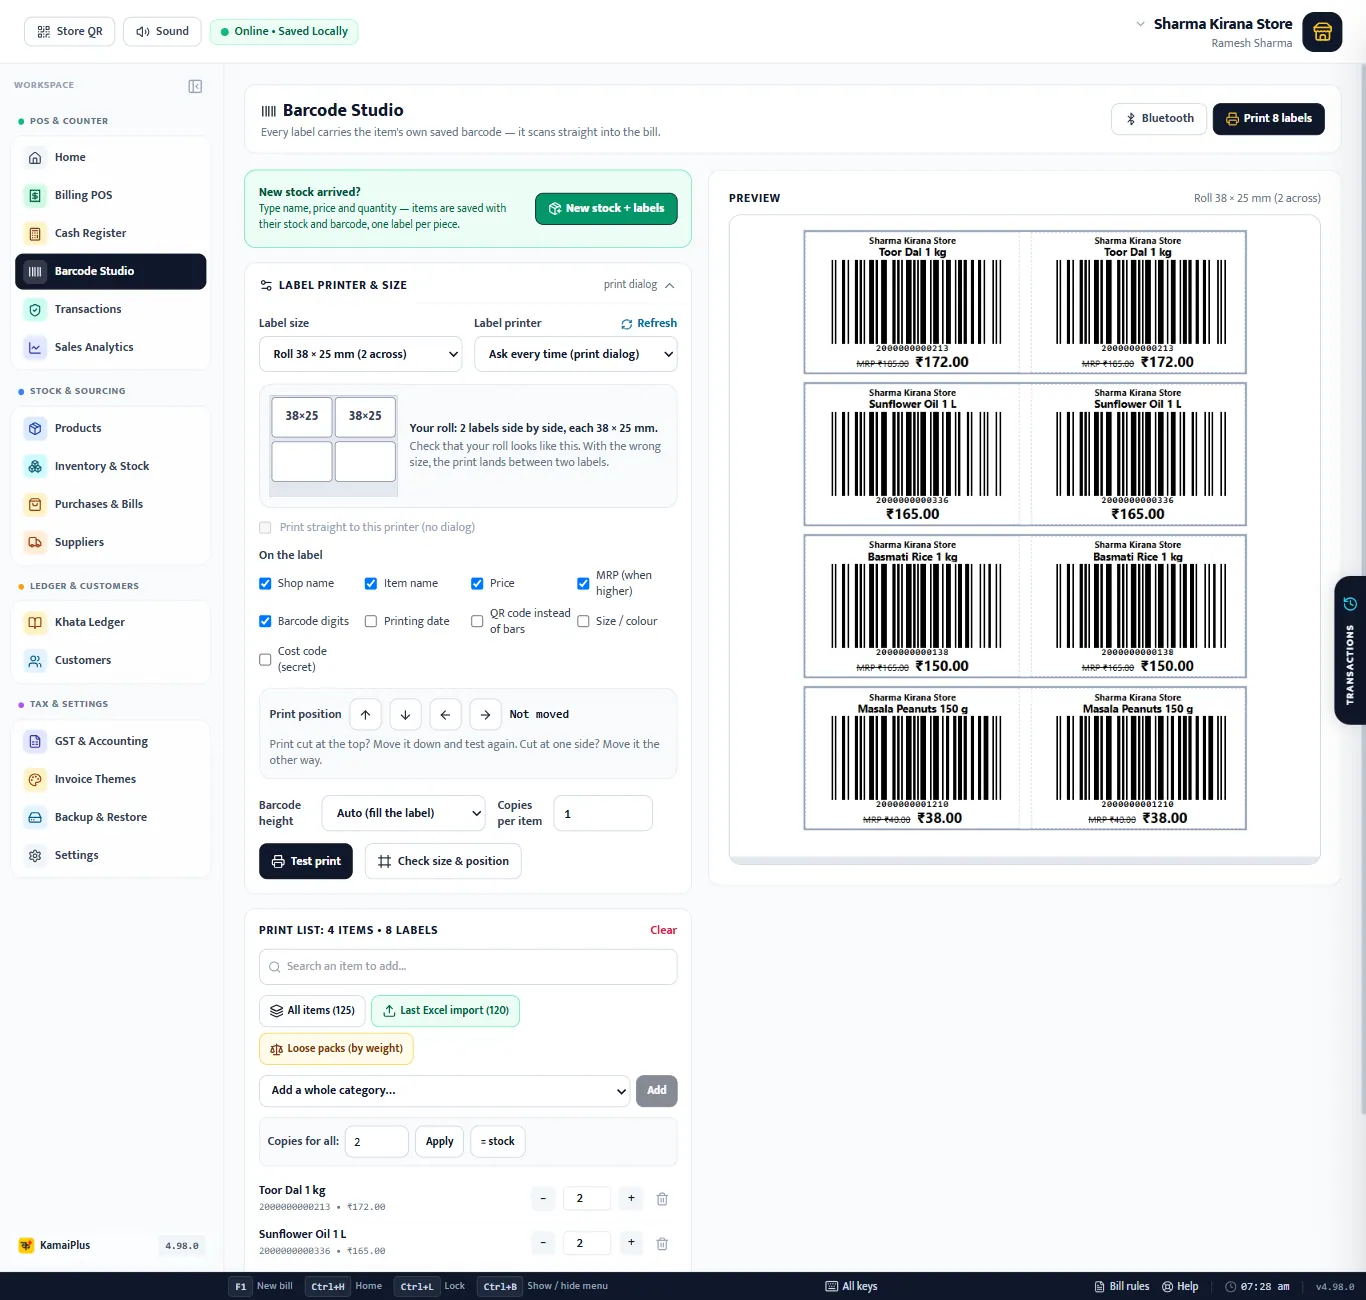
- 1New stock + labels: type a delivery and print its labels in one go (below).
- 2Label size: the roll or sheet you loaded.
- 3Label printer, with Refresh. Ask every time (print dialog) shows the Windows print window.
- 4Your roll drawn to scale. Hold the real roll next to it.
- 5Print straight to this printer (no dialog), once a printer is chosen.
- 6On the label: what each label shows (table below).
- 7Print position: moves the print ↑ ↓ ← → in half-millimetre steps (up to 10 mm).
- 8Barcode height: Auto (fill the label), or 6 to 20 mm. With a set height, a long name makes only the bars give way, so the price is never cut.
- 9Copies per item: the starting count for items you add.
- 10Test print (one sample label) and Check size & position. With a printer chosen, Calibrate printer appears here too.
- 11Print list: how many items and labels; Clear empties it.
- 12Add items: search, All items, Last Excel import, Loose packs (by weight) or Add a whole category.
- 13Copies for all + Apply, or = stock (one label for every piece in stock).
- 14Preview: the labels exactly as they will print, row by row.
- 15Bluetooth: prints on a Bluetooth 58 / 80 mm receipt printer instead (English letters only: Hindi names print as "?").
- 16Print 8 labels.
Label size
Pick exactly the roll you loaded. A 50 mm label sent to a 38 × 25 mm, 2-across roll lands on the gap between the two labels.
| Label size | Use |
|---|---|
| Roll 50 × 25 mm (1 across) | The most common kirana roll. The default. |
| Roll 38 × 25 mm (1 or 2 across) | Small packets. The 2-across roll is common on the TSC TE244. |
| Roll 50 × 25 mm (2 across) | Two labels side by side. |
| Roll 40 × 30, 50 × 30, 75 × 50, 100 × 50 mm | Bigger labels: garments, boxes, cartons. |
| A4 sheet, 24 / 40 / 65 labels | Sticker sheets on an office printer. |
| Custom roll size… | Width 15–120 mm, height 10–120 mm, 1 to 5 across, gap 0–10 mm. |
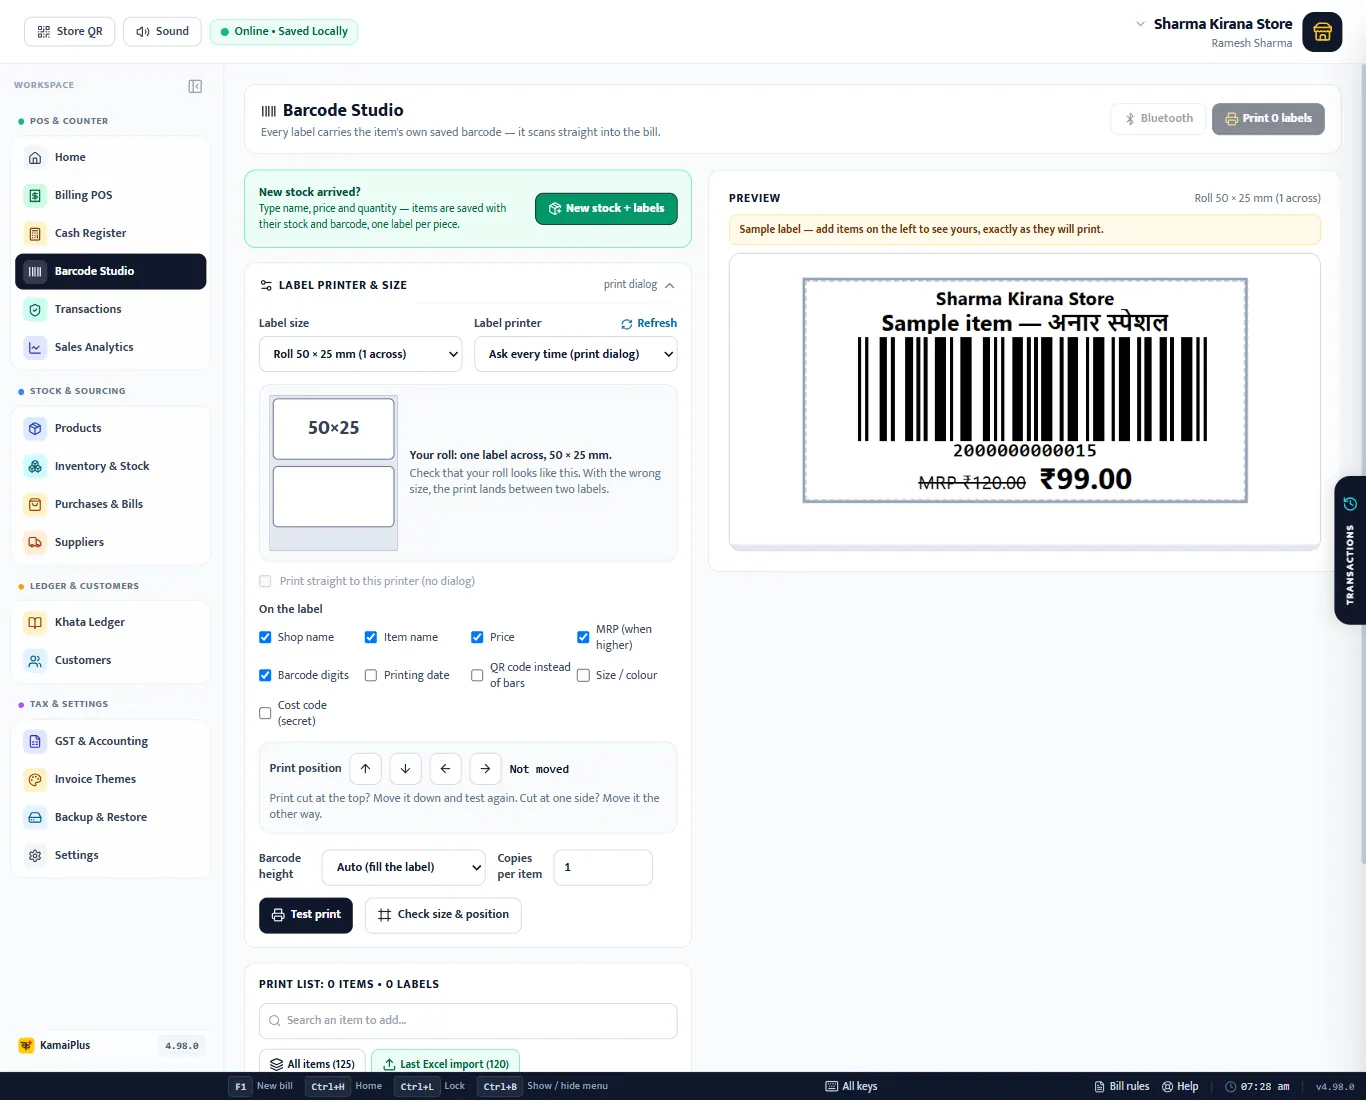
Calibrate a new roll
A label printer has to learn where each label starts. Until it does, the first labels print a few millimetres off: the price lands on the gap or on the next label.
- The first label print to a printer at a label size calibrates it by itself: it feeds 2–3 blank labels once, then every label lines up. Under the buttons it then says Printer set up for this label size on ….
- Loaded a new roll? Press Calibrate printer.
- If the calibration cannot be sent, the app shows the by-hand steps: switch the printer off, hold FEED, switch it on and let go when the light blinks.
Check size and position
- Click Check size & position. One row prints with a frame just inside each label.
- Whole frames: all is right.
- Frame cut at one side or the top: use Print position to move it the other way, then check again.
- Frame on the gap between labels: the label size does not match the roll. Choose another size.
Label size Roll 38 × 25 mm (2 across) → Label printer TSC TE244 → Calibrate printer → Check size & position: both frames whole → tick Print straight to this printer.
What prints on the label
| Option | What it adds | Default |
|---|---|---|
| Shop name | Your shop's name on top. | On |
| Item name | The item's name. | On |
| Price | The selling price, large. | On |
| MRP (when higher) | The MRP struck through, when it is above the price. | On |
| Barcode digits | The code under the bars. | On |
| Printing date | Today's date. | Off |
| QR code instead of bars | A QR code, for small labels. | Off |
| Size / colour | The variant, for garments and footwear. | Off |
| Cost code (secret) | The cost price written in your own code word of 10 different letters, e.g. BLACKHORSE = 1 2 3 4 5 6 7 8 9 0. Only you can read it. | Off |
The print list
- Search an item and click it, or add All items, the Last Excel import or a whole category.
- Set copies with − and +, type a number, or use Copies for all / = stock.
- Click Print … labels at the top.
An item without a barcode shows "new code on add". It gets a shop code before its label prints, and the code is saved on the item, so the label scans at the counter. Items with sizes or colours print one label per variant, each with its own code.
New stock + labels
For a delivery that is not on a supplier bill: type what came in. Each row is saved as an item with its stock and its own barcode, and gets one label per piece.
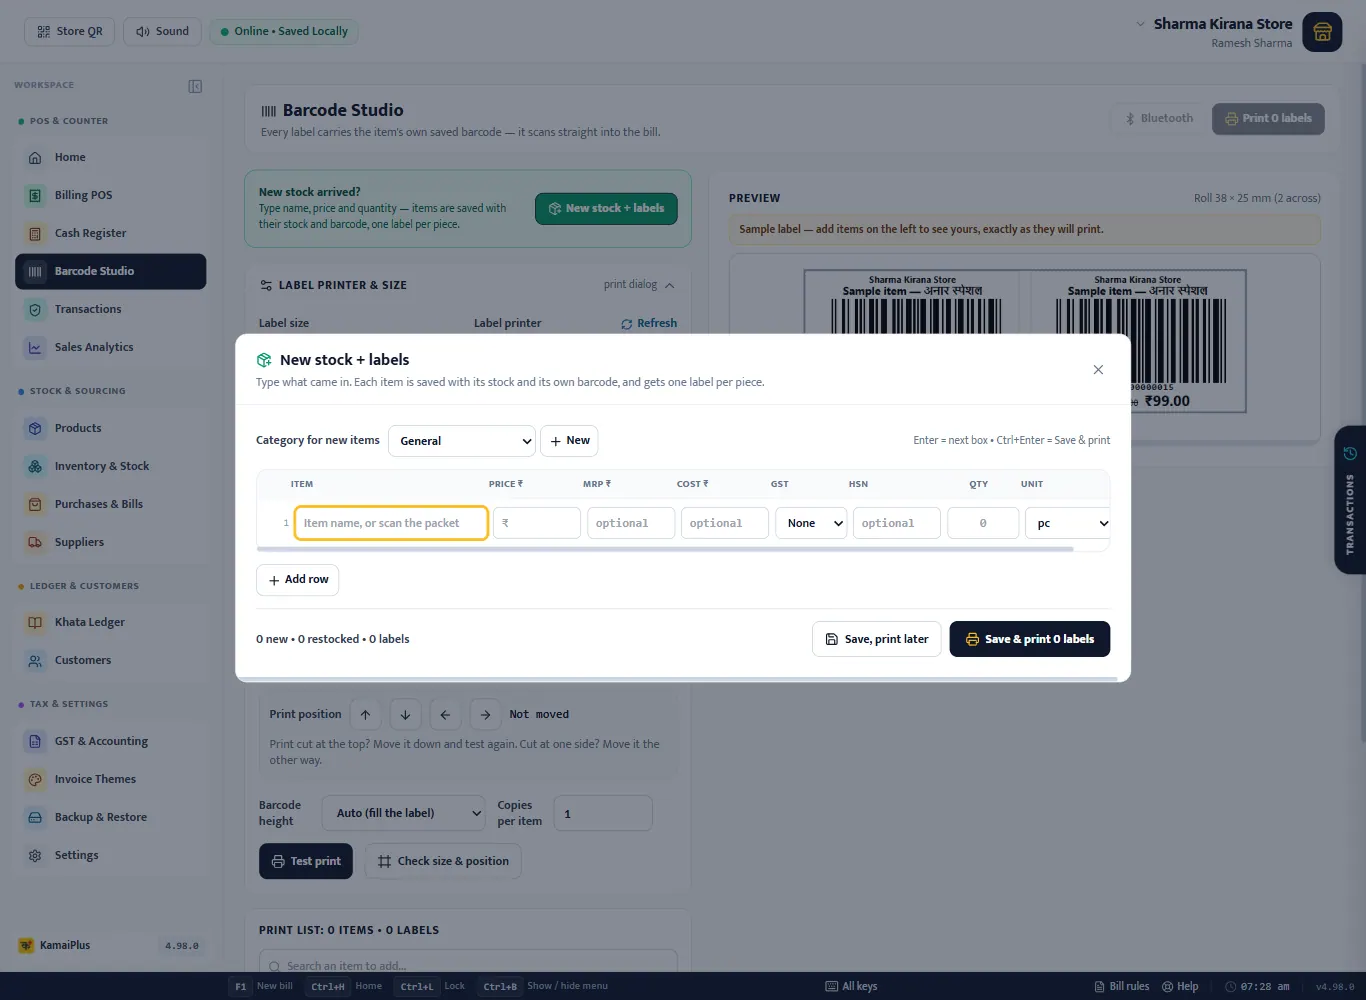
- 1Category for new items, or + New for a new one.
- 2Item: type the name, or scan the packet. A saved item's barcode restocks that item; a new barcode is kept for the new item, with its name and price filled in when the app knows the code.
- 3Price, MRP, Cost, GST, HSN. The extra columns follow Settings → Features ON / OFF.
- 4Qty and Unit: the pieces that came in = the labels printed.
- 5Enter goes to the next box; on the last box it opens a new row. Ctrl + Enter saves and prints.
- 6Add row.
- 7How many items are new, restocked, and how many labels.
- 8Save, print later: saves the stock now, labels later.
- 9Save & print … labels.
Loose packs by weight
Packing dal, sugar or dry fruits from a sack into 250 g and 500 g packets? Loose packs (by weight) makes one label per packet whose bar code carries the item and the weight. The price on it is the item's rate × the weight, and one scan at the counter adds exactly that packet.
- Pick an item sold by kg, gram, litre, ml or metre.
- Pick the pack sizes (or type one in g / ml / cm) and the count of each.
- Add … labels to the print list, then print.