
Before you start
- A Windows 10 or 11 PC (64-bit), 4 GB RAM or more, about 500 MB free space.
- Your licence key. It looks like KPD-XXXX-XXXX-XXXX-XXXX. WhatsApp us your shop name and we send one for your PC.
- Internet, only for the activation step.
- Optional: your price list in Excel, a USB barcode gun and a bill printer. You can add them later.
Install
- Open the Download page and download the installer (about 100 MB).
- Double-click the file. If Windows shows "Windows protected your PC", click More info, then Run anyway.
- Keep the suggested folder, click Install, then Finish with "Run KamaiPlus Desktop" ticked. A KamaiPlus Desktop shortcut is placed on the desktop.
Updates are automatic. While the app runs it checks for a new version every hour, and installs it the next time you close and open the app. A bill is never interrupted by an update.
Activate the licence
The first screen asks for the licence key. One key works on one computer.
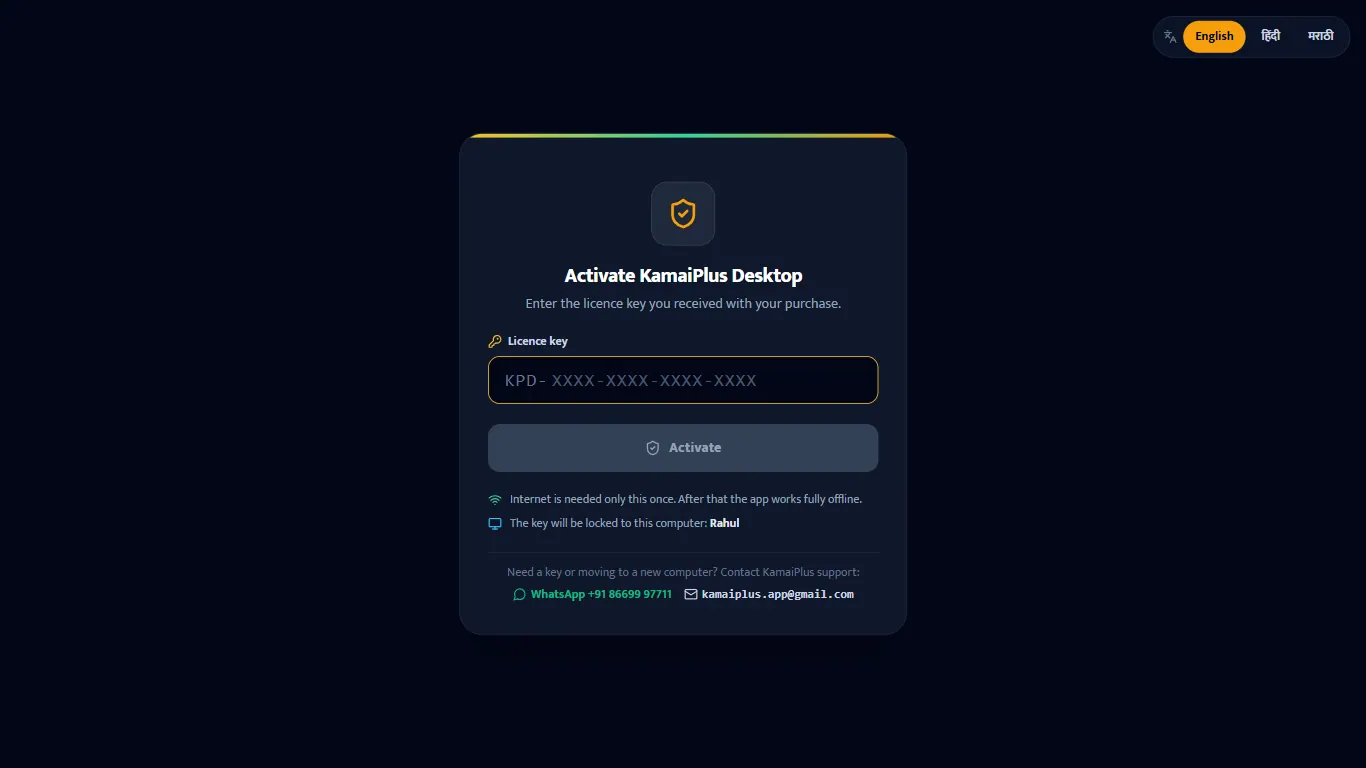
- 1Licence key: type or paste the key. The KPD- part is already there.
- 2Activate: needs internet for a few seconds.
- 3The key is locked to this computer; its name is shown here.
- 4Need a key, or moving to a new computer? The support WhatsApp and email are on this screen.
Master password
Right after activation you set the shop's master password. The app asks for it every time it opens and after it locks itself when nobody uses it (10 minutes by default).
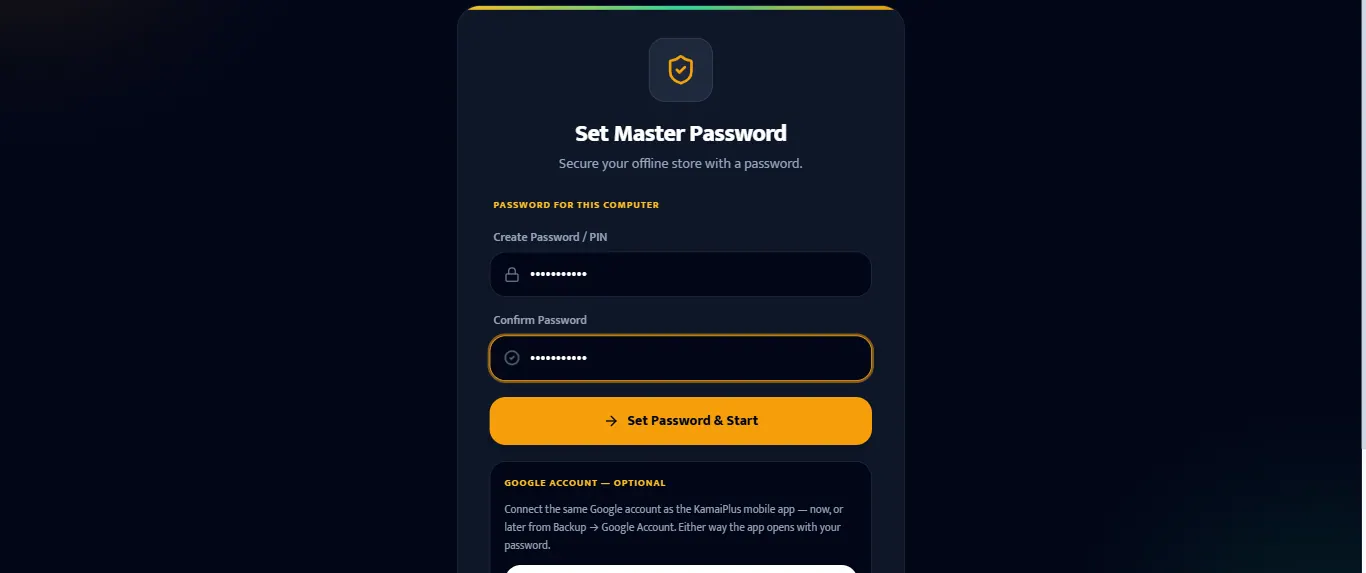
- 1Create Password / PIN: anything you will remember; a mix of letters and numbers is safer.
- 2Confirm Password: type it again.
- 3Set Password & Start.
- 4Google account (optional): connect the same Google account as the KamaiPlus mobile app, now or later from Backup → Google Account. The app opens with the password either way.
Write the password down and keep it away from the counter. Staff who should not see profit can be kept out with the Cashier Privacy PIN instead (see Store settings).
Store setup
Four boxes. What you type here is printed at the top of every bill, so spell it the way customers know the shop.
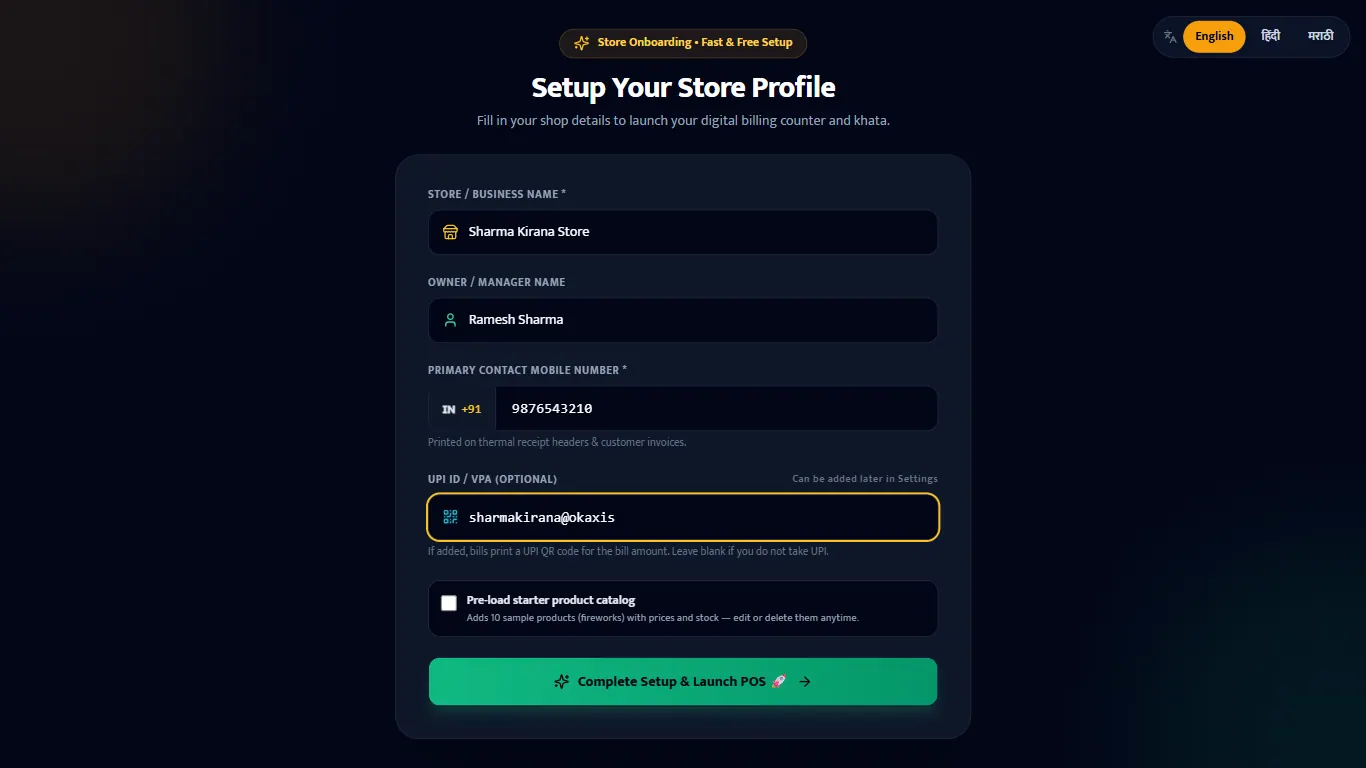
| Field | What to enter | Example |
|---|---|---|
| 1Store / Business Name * | The shop's name as on the board. Required. | Sharma Kirana Store |
| 2Owner / Manager Name | Shown on the bill header and in the top bar. | Ramesh Sharma |
| 3Primary Contact Mobile Number * | 10 digits, no +91. Printed on bills and receipts. | 9876543210 |
| 4UPI ID / VPA (optional) | Your shop's UPI ID. Bills then print a UPI QR for the exact amount. Leave blank if you do not take UPI. | sharmakirana@okaxis |
| 5Pre-load starter product catalog | Adds 10 sample fireworks items. Leave it off for a real shop; import your own list instead. | Off |
| 6Complete Setup & Launch POS | Saves and opens the app. |
GSTIN, address, pincode, a second phone, bank details and the logo are added later in Settings → Store & GST Profile.
The Home screen
Home is the first screen after the password. Here it is at the end of the demo shop's first day: 14 bills, ₹6,224 of sales after one return.
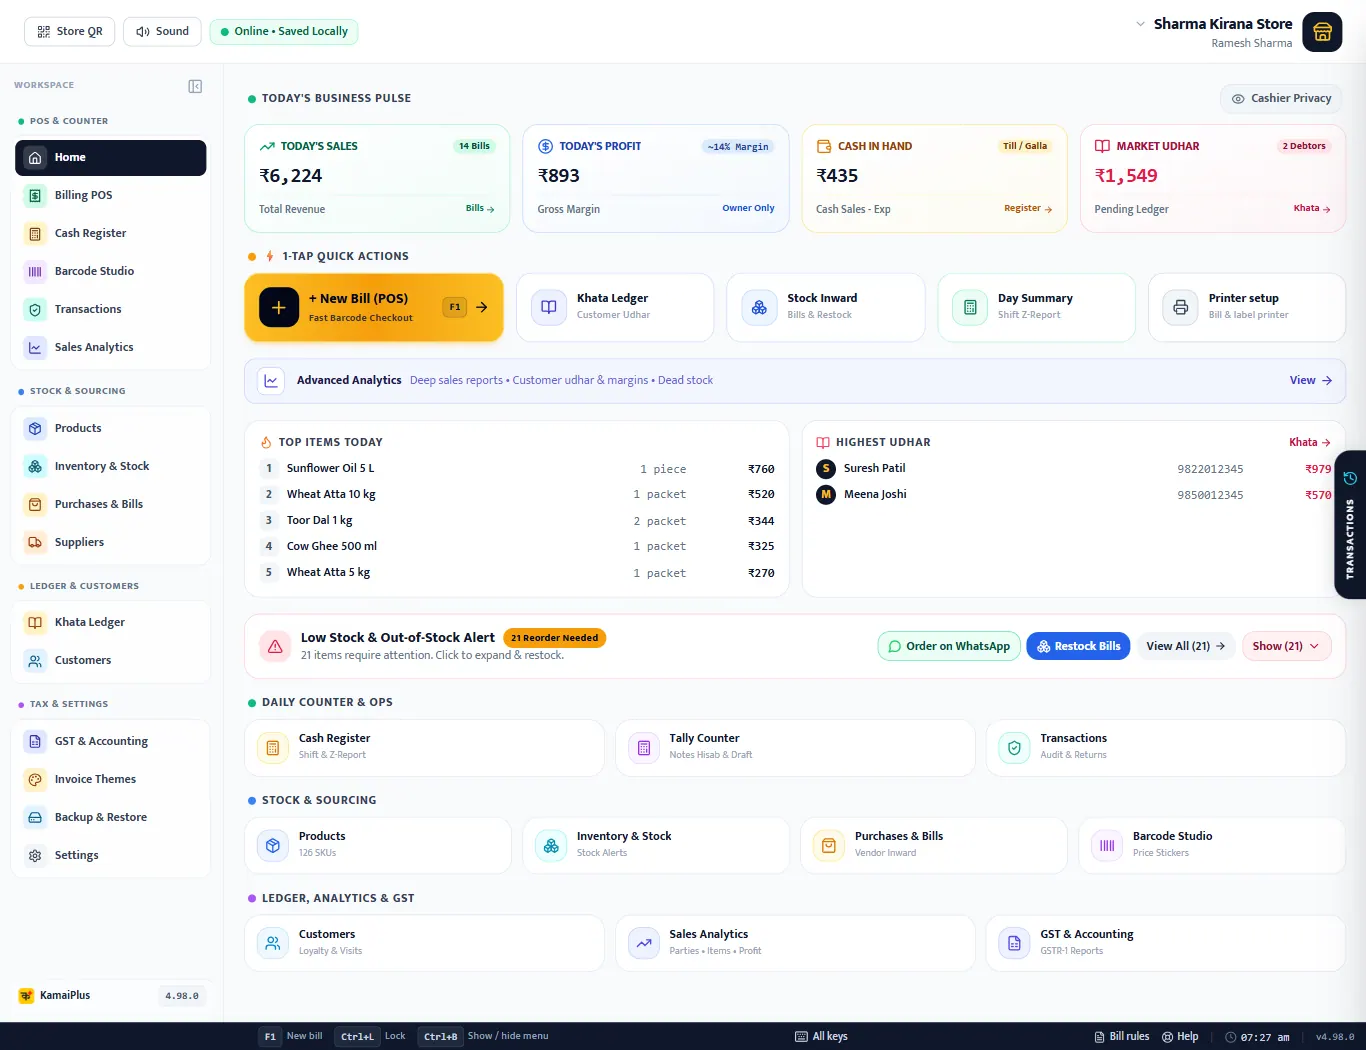
- 1Today's Sales: total of today's bills and how many. Click Bills to open them.
- 2Today's Profit: sales minus buying cost, with the margin. Hidden from staff when Cashier Privacy is on.
- 3Cash in Hand: today's cash sales minus the cash paid out. The morning float is not included; the Cash Register shows the full drawer.
- 4Market Udhar: what customers owe you in total, and how many customers.
- 5+ New Bill (POS), or press F1 from any screen. Next to it: Khata, Stock Inward, Day Summary and Printer setup.
- 6Low Stock & Out-of-Stock Alert: items below their warning level, with Order on WhatsApp and Restock Bills.
- 7The menu on the left: every screen. Ctrl + B hides it to give the counter more room.
- 8The status bar: the keys that work on this screen, All keys, Bill rules, Help, the printer and the app version.
What to do next
- Fill in GSTIN, address and bank details: Store settings and features.
- Bring your items in: Import your price list from Excel, or add products one by one.
- Connect the printer: Set up the bill printer.
- Make the first bill: Make a bill at the counter.